

Clipping paths are one of the most popular ways to prepare your product photos for white backgrounds and other digital uses.
Not sure which other photo editing tricks can bring the needed drama and extra definition to your product images? Let’s explore your options with before / after examples so you can learn to spot the needed photo editing technique.
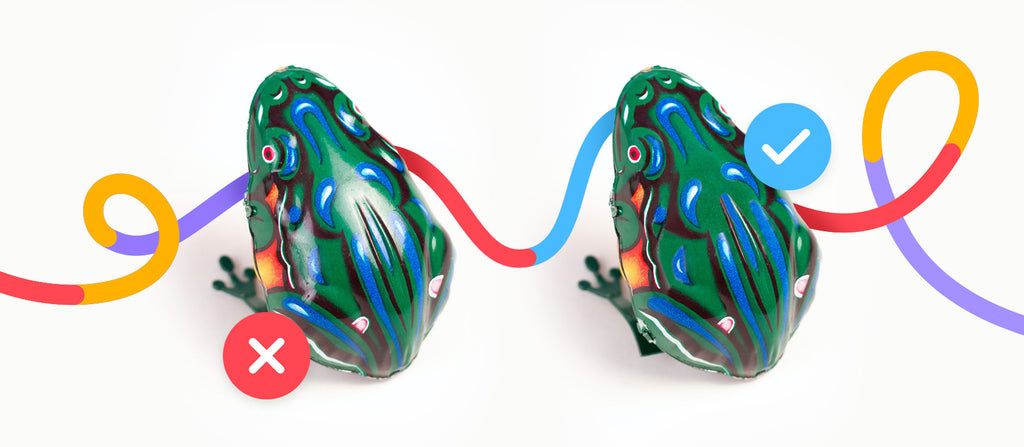
1. Background removal via image masking
While clipping paths are ideal for removing backgrounds from items with straightforward edges, not every job is clean. In some cases, we have hair, fur, grass, and other fine details that don’t lend themselves to the nice clean lines we use when we create clipping paths. For images with these hairy details, image masking, compared to clipping paths, is the way to go.
Image masking is a more advanced method of background removal that’s also more detailed and time-consuming. This is why we use it as needed, not as a go-to choice.

The masking post-production technique uses artificial intelligence (AI) to recognize the borders of an object and make some parts of the image transparent, bringing pixel intensity of the identified parts to zero.
Generally, the more complex your object’s silhouette, the higher resolution you’ll need to use when editing—and the more likely image masking will yield cleaner, true-to-life results.
2. Get rid of product blemishes and imperfections
However carefully you handle your object during a photoshoot, the inevitable fingerprint, dust, smudge, or otherwise imperfect spot will make an appearance.
If you have these issues in your shot, photo retouching can help. The best retouching method depends largely on the material and reflectiveness of the item.
In the example below, a chair image was improved by removing the inconsistent spots that appear on the fuzzy suede-like material. The original image shows the fabric’s imperfections, whereas the edited image shows the product as it’s meant to be displayed.

3. Smooth wrinkles on fabric
While you want to iron or steam any fabrics prior to shooting, wrinkles and imperfections are also typically inevitable. Photoshoots are long and models are only human—an odd deep crease is almost unavoidable on most of the fabrics. You can use a “digital iron” to smooth out those wrinkles in Photoshop.
In this case, the Healing Brush Tool, Clone Stamp, and Content Aware Fill Tool help to make a perfect photo even with slight imperfections.
Check out how retouching turned a pair of messy, heavily creased shorts into a neat pair from visibly natural materials in the example below from fashion boutique Motif Concept Store.

4. Add or remove reflections
While some lighting effects are intentional, product shots can also end up with the occasional glare, reflection, or otherwise unwanted distraction due to light. Natural lighting is best for product photography, but you can’t control it. And setting up artificial lighting for your product photoshoot requires advanced skills and expensive equipment.

In other cases, you might want to add a reflection of a product to your shot. Maybe you weren’t able to get the angle right, the lighting wasn’t working, or you didn’t have a reflective surface available for the shoot. This is also possible in Photoshop. These images work well in print and digital ads, social media imagery, emails, and other marketing collateral.
5. Remove price tags and hangers
When shooting products, it’s best to remove price tags, hangers, and other distracting elements prior to taking the pictures. But that’s not always possible. Sometimes, you need to rely on Photoshop to remove these items after the fact.

And while it might seem straightforward, removing these unwanted elements may involve a combination of post-editing techniques like clipping paths, image masking, the healing brush, and more.
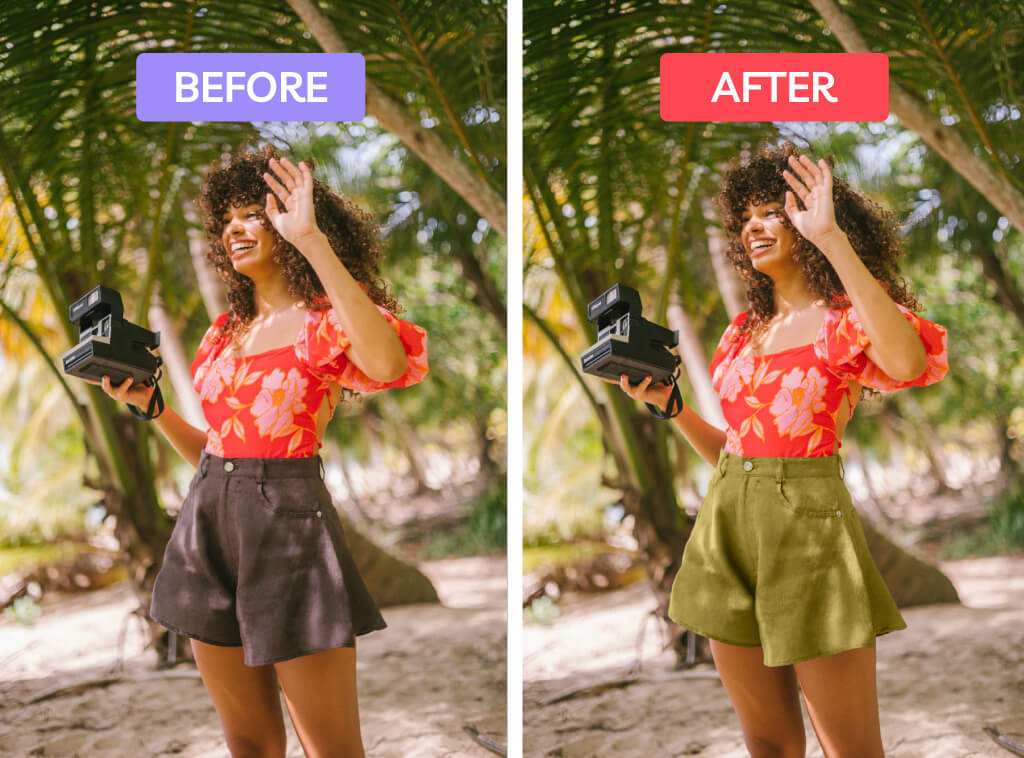
6. Change colors in Photoshop instead of taking new shots
When you have a product available in a number of colors or prints, but otherwise the design is exactly the same, you can simply change the color in Photoshop. Rather than spending time and money on coordinating an entirely new shoot for each new print or variant, you can prep your images using the content you already have.
Best part is, because it’s tedious and not too advanced, color change is a service you can easily outsource. Check out how natural the edited khaki shorts look in the example below.
7. Add shadow for dimension on white background
It may seem trivial to a novice in ecommerce sales, but every seasoned etailer knows the value of a drop shadow in the background. It gives an object extra dimension and depth, helping it jump off the page instead of looking flat and lifeless. Moreover, items look more realistic with a shadow.
See how a small natural show turns this flat image of earrings into a more realistic photo that jumps off the screen. It almost gives it a 3D-like quality.
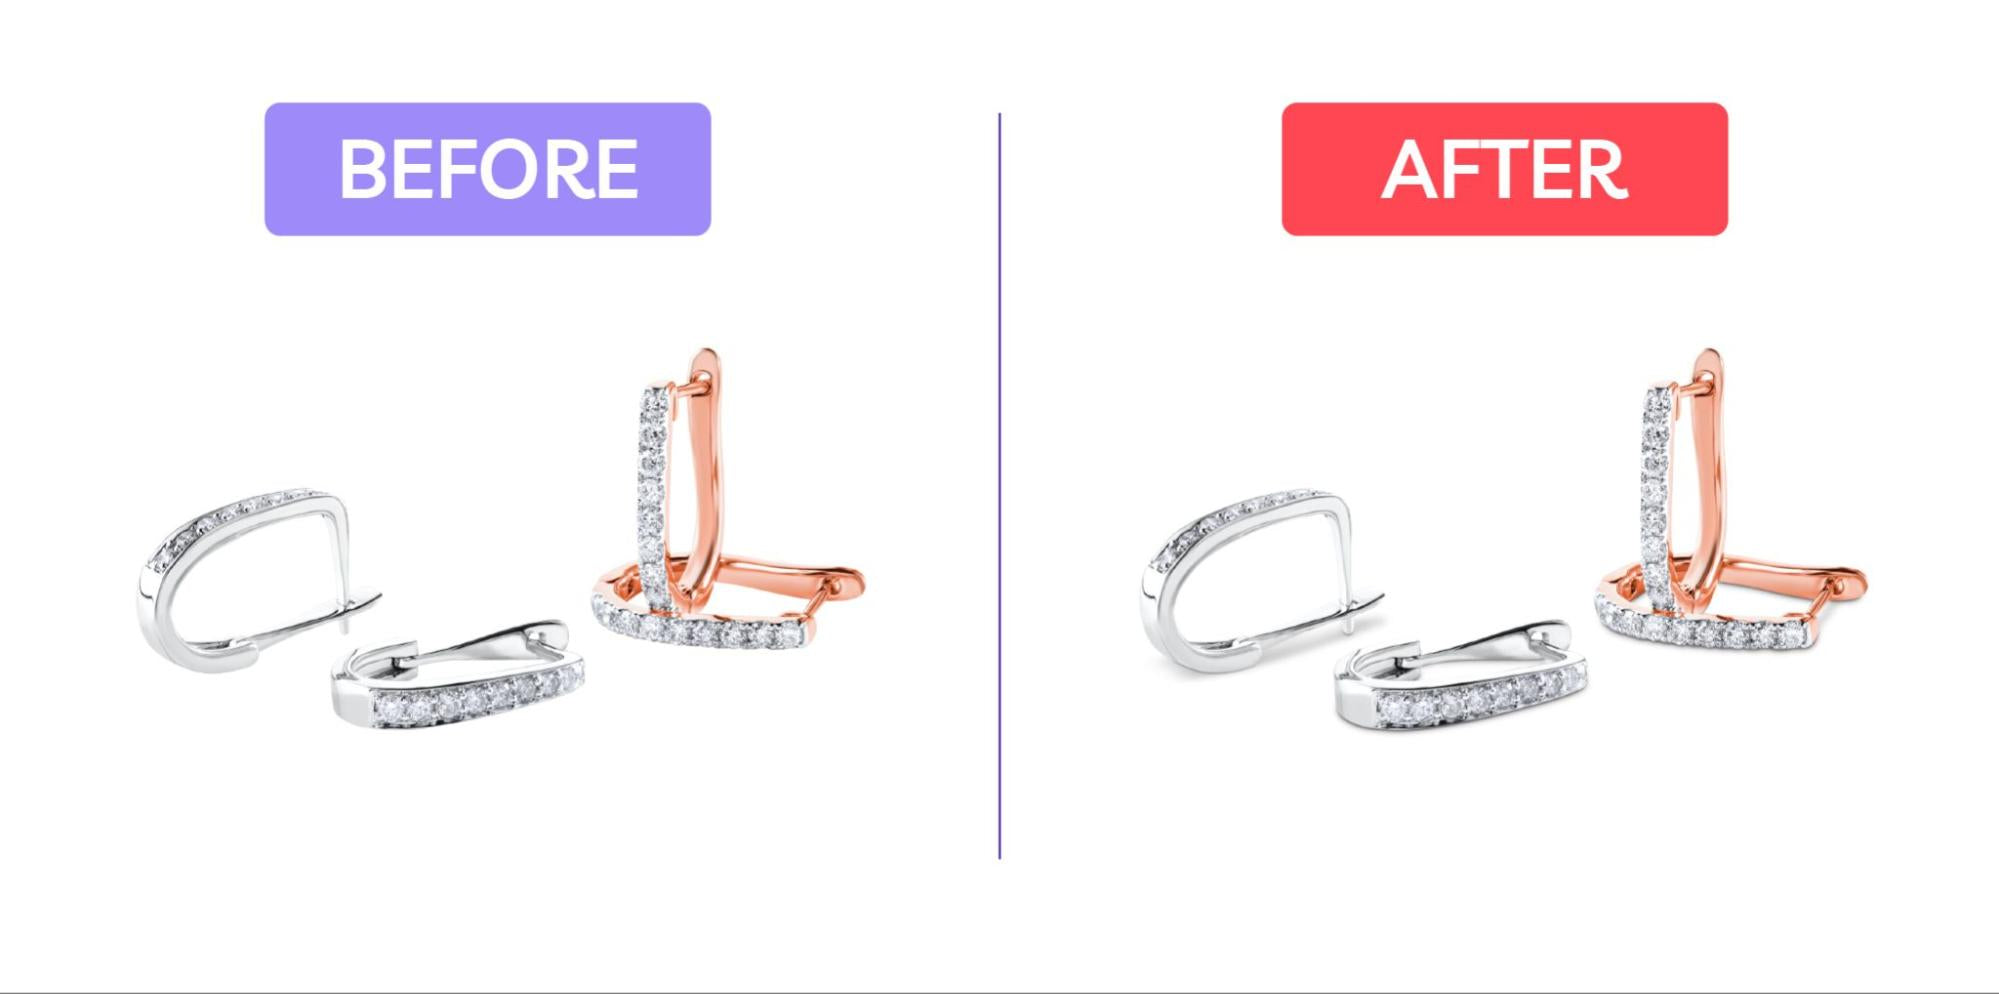
Creating realistic drop shadows to a series of products styled as a web catalog needs a lot of attention, as the shadows should contribute to the general feel of consistency and professionalism, as opposed to creating a chaotic feel to the listings. And you want to make sure your shadows are realistic. Bad shadows could make your image look low-quality and spark mistrust in your audience.
8. Add a ghost mannequin for apparel product photos

To do ghost mannequin edits, you’ll need to know ahead of time. While other editing techniques can be applied to almost any product image, ghost mannequin photos must be shot and edited a certain way. You can’t just shoot an image of a T-shirt in a flat lay mode and then convert it to the ghost mannequin type. You have to take a picture of a garment on a mannequin to enable further manipulations.
This image editing technique is a popular compromise for brands that need models for their apparel photos but don’t have the ability to hire models for shoots. So it has the best of both worlds: it doesn’t cost a small fortune, but it looks almost as if worn by a person, making it easier for potential buyers to picture wearing it.
Depending on the garment cut, you may need to do one or a combination of ghost mannequin services: neck joint service, bottom joint service, or sleeve joint service. The most advanced technique in this category is called mannequin to model, where a piece of clothing is Photoshopped onto a model. The trick here is to make sure both plastic and live models are in the same pose.
Product photo enhancements as a service
Ecommerce photos almost always go through post-processing enhancements to be able to effectively do their job of attracting customers, educating them about the product, and ultimately converting them into buyers.
No Photoshop skills or spare time to do it yourself? You can outsource the most tedious and time-consuming edits to Path, your virtual photo-editing studio. Our edits start at just 39¢ per photo, and every edit is completed by hand—not some automated, mistake-prone software.

Let us look after your image edits, so you can get back to the fun stuff. Try Path free.
Learn more


![How to Create a Clipping Path in Photoshop [Updated for 2022]](http://pathedits.com/cdn/shop/articles/image14.jpg?v=1639448433 "How to Create a Clipping Path in Photoshop [Updated for 2022]")


