
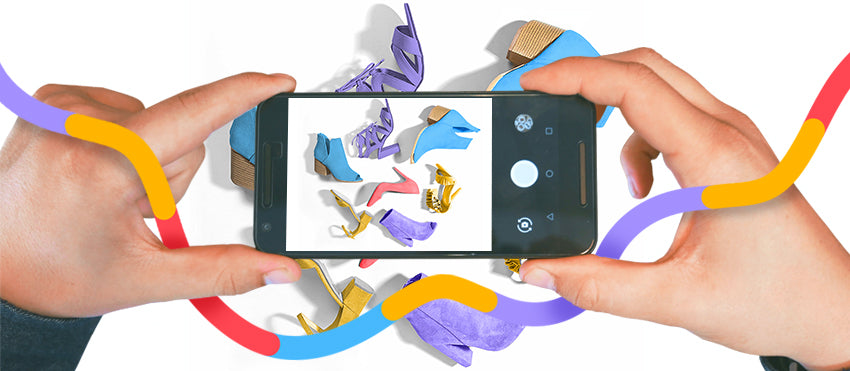
Just because you don’t have an expensive camera doesn’t mean you can’t create high-quality photos that highlight your products. While you should eventually invest in professional photos, with the right tools and knowledge, you can use your smartphone to take pictures in the meantime.
Not sure where to start? Let’s dig into the why and how of shooting Amazon product images with your smartphone:
The importance of Amazon images
What’s the first thing you notice when you’re shopping online? For many people, it’s the images. In fact, a Weebly survey found that more than 75% of online shoppers consider these images “very influential” to their purchase decision. The photos in your Amazon store are what draw consumers in so you want them to be as engaging as possible.
What role do the images play? They should stand out because your products will be listed among thousands of others. The photos should also complement your listing; buyers are more likely to be turned off if the pictures and description don’t match. You also want to make sure you provide an accurate visual of the product — you want what shows up at buyers’ homes to match what they ordered.
To catch people’s eye, you want to make sure your hero image is polished and all of the supporting images are appealing (and appropriately showcase the product and how it’s used). For example, Amazon merchant Yan Hou Tang tea features a crisp hero image and several lifestyle images and infographics — combined, the images give buyers a good idea of what they’re purchasing, background on the product and benefits of the product.

Shooting for Amazon vs. your website
You want high-quality photos for both your site and for Amazon, but Amazon has some specific product image requirements, both technical and aesthetic.
All of the photos you upload to Amazon must meet these requirements:
Technical
- Only these file types are allowed: TIFF, JPEG, GIF, and PNG.
- Your images have to be at least 1000 pixels or larger, either in height or width.
- The color mode should be sRGB or CMYK.
Naming convention
- All file names should consist of the product identifier, followed by a period and the file type.
- Spaces, dashes or additional characters aren’t allowed.
Main product image
- Your hero image must have a white background (RGB 255,255,255).
- Avoid illustrations, text or other objects in the frame (for example, product dimensions).
- The color of the product should be realistic, so stay away from extreme filters or editing.
Additional images
- You can use other objects or people to scale.
- Lifestyle and other backgrounds are allowed.
- You can add text and other graphics.
Pro tip: Amazon has special requirements for product descriptions, too, including parameters for length, format, and content. Learn more here about writing and optimizing Amazon product descriptions.
How to use a smartphone camera for Amazon product photos
Before you start snapping photos, get to know your phone and its camera settings. Ideally, your smartphone will have at least a 12-megapixel camera — in general, the higher the megapixel count, the better. Typically, the higher the megapixel number, the sharper the image. However, sensor technology, for example, can also affect resolution. Most newer phones are going to come with a 12- to 16-megapixel camera and have adequate software to match.
Once you know your phone’s camera is up to the task, it’s time to start creating product photos for Amazon:
- To make it easier to take quality product photos with your phone, consider investing in tools such as a tripod, a white backdrop, bounce boards, reflectors, etc.
- Take some time to learn basic lighting techniques. Proper lighting adds depth and contrast to the image. If you don’t have access to high-quality artificial lighting, daylight is the best alternative.
- Find the best angle for the product (e.g., eye-level vs. slanted). Keep in mind, the angle won’t be the same for every product. Professional photographer and educator, Jeanette Lendon, says you can stand on something to get a or crouch down to get a different perspective. She writes, “Maybe look at the shooting level to show texture. Try turning your camera upside down, lengthways, to get a different perspective too.”
- Plan to include at least one lifestyle photo. It encourages emotional connection by helping shoppers better imagine how the product will fit into their own lives.
- If possible, include a photo that shows the product packaging. This helps with authenticity — consumers will know what to expect when they place an order.

Start taking photos
Always use your back camera (it’s almost always higher quality than the “selfie camera”), and make sure you have ample storage room before you begin shooting.
Set your smartphone camera settings
Smartphone cameras aren’t quite the same as a DSLR camera, for example, but that doesn’t mean you’re limited to the automatic mode. You can manually adjust certain settings on your smartphone camera.
White balance
This setting balances the color temperature. It helps remove color casts so the white you see in person is the same in the photo.
Aperture
The aperture is the lens opening that light passes through. The larger the aperture (or opening) lets more light in. Aperture also affects the depth of field.
ISO
This controls the sensitivity of your camera's sensor to light. Increasing ISO (International Organization for Standardization) will brighten the image, but if it’s increased too much, the photo will have noise (or be grainy).
Shutter speed
Much as it sounds, shutter speed controls the length of time the shutter is open (duration of exposure). For example, for action photos, you typically want to use a faster shutter speed to avoid blurriness.

Pro tip:The aperture, ISO, and shutter speed make up what’s commonly called the “exposure triangle.” Mastering these settings and how they work in relation to one another is essential for photographers.
To get to know your phone’s camera settings a little better, you can also check out these resources:
- Samsung Galaxy: Using Pro Mode on my Samsung Phone
- iPhone: 6 Advanced iPhone Camera Controls For Jaw-Dropping Photography
Editing your smartphone product photos
When it comes to smartphone photography, you’re likely going to need to do some work in post-processing to get it up to standards. That’s why it’s a good idea to always plan for photo editing after each shoot.
Some edits are better handled in-house, while others are suited for outsourcing. If you’re not sure how to make sure the background is the correct color white, for example, you may want to outsource your photo editing.
Smartphone photography tips
Morgan German, a photographer who shoots primarily with an iPhone, shares these tips for perfecting your smartphone photography:
- “Natural light is very important,” she says, noting that you shouldn’t plan on using the flash on your phone. While natural light is best, it’s not always attainable. In that case, you can refer to this guide to lighting for photography to make sure your shot is well-lit.
- “Don’t be afraid to move around at different angles,” German says. “It’s much easier to take that really cool photo with a phone in hand because digital cameras can be cumbersome!”
- Keep your smartphone product photos organized. “I like to have an album in my photos app specifically for @itookitonmyiphone photos. I recently started doing this, and it’s been a tremendous help.” You can also refer to this guide to digital asset management for in-depth tips at staying organized.
- Although it may seem obvious, “keep your phone charged.” Bring along a portable charger if you have one — or buy one if you don’t. You can get them at all price points.
- Get the product in focus. On most phones, you can touch to focus.
- Make sure your phone’s camera is clean. Dust and smudges will affect the image quality.
Use the grid setting to help you center the product. (Note: Per Amazon requirements, the product should fill up 85% of the frame.) - Want more crisp macro shots or a wide-angle image? Consider an external lens. There are plenty to choose from. If you decide to go this route, make sure the lens easily attaches and detaches and that the lens is suitable for your needs.
Things to avoid when shooting smartphone product photos:
- Zoom: Don’t use your zoom feature. Although most smartphones come with great cameras, the image quality gets worse the more you zoom. That’s because it’s not a true zoom — smartphones basically just crop the image. For a better picture, just move your phone closer to the product.
- Flash: Again, keep the flash off. The big burst of light will overexpose the image (and look horrible). Remember: You can lighten a darker photo with editing, but there’s little you can do for a washed-out image.
- Filters: Almost all cameras come with filters and other editing tools. Since authenticity is an Amazon product image requirement, keep the filters off for now.
Learn more with smartphone photography courses
If you want to improve your skills a little, there are tons of ways to do that online. You can find virtual classes, courses, and guides to learn more, specifically about smartphone photography.
Here are a few smartphone photography courses and resources to check out:
- Smartphone Photography for Instagram Success: Capturing Stunning Lifestyle Photos With Your Phone, Skillshare (free for new members): Photographer and teacher Sean Dalton focuses on virtual storytelling, fashion photography on your phone, and more.
- Mobile Photography iPhone and Android Complete Masterclass, Udemy ($19.99): You’ll learn about lens distortion, photographing people, and night photography — all on your phone.
- Smartphone Photography 101, Photography Concentrate (free): If you want a quick online guide that covers all the basics of smartphone photography, this resource is for you.
- Smartphone Photography Masterclass for Business, Jet Black Squares: Professional commercial photographer turned educator Jeanette Lendon creates custom smartphone photography workshops for businesses and corporations.
And if you prefer books:
- Smart Phone, Smart Photography: This book covers photography fundamentals and explores smartphone-specific techniques for taking great photos.
- The Smartphone Photography Guide: Learn the definitions of technical terms and get pro tips from photographer and author Peter Cope.
Or, go with a pro
If all of this seems overwhelming, you may be better off hiring a professional commercial photographer. Although this requires a bit of investment, online shoppers judge a product’s quality by the quality of the photos so it’s worth the cost.
Do your research when hiring a professional. You’ll feel more secure in your decision and will likely get better results. Here are a few questions you might want to consider the following questions:
- Do they have experience in your industry?
- Do they have a portfolio of Amazon-ready product photography?
- Do they have time for your project?
- What’s their average turn-around time?
Put your best foot and photos forward
Whether you’re using your smartphone until you can secure a pro or to supplement other product images, it’s so important to get it right — product photos are your first impression for buyers, and better photos mean more sales.
Amazon smartphone photography FAQs
Which smartphone takes the best pictures?
The following smartphones take the best pictures:
- Samsung Galaxy S21 Ultra
- Huawei Mate 40 Pro
- iPhone 12 Pro Max
- Samsung Galaxy Note 20 Ultra
- Huawei P40 Pro
- iPhone 12 Pro
- Google Pixel 5
How do I take good pictures with my smartphone camera?
You take good pictures with your smartphone camera by adjusting the camera’s settings, making sure the lighting is right, and following the other advice in this post.
How do I take a photoshoot at home with my phone?
You take a photoshoot at home with your phone by dedicating a space to stage your products and shots. Set up your frame, get your camera, and start shooting. You can also use this guide to creating an at-home studio.


